


Google recently announced its free Public DNS resolution service. Google assures you that by using Google Public DNS your web-surfing experience will be much more faster and reliable.Just like OpenDNS, Google DNS can be easily setup on Windows based computer (XP, Vista and 7). I am posting a simple tutorial here which will help you to setup the Google Public DNS on your computer.
Follow the simple steps :Step 1 : Go to the Control Panel.
Step 2: Select Network and Internet > Network and Sharing Center > Manage network connections.
Step 3 : Select the Local Area Connection then click on Properties.
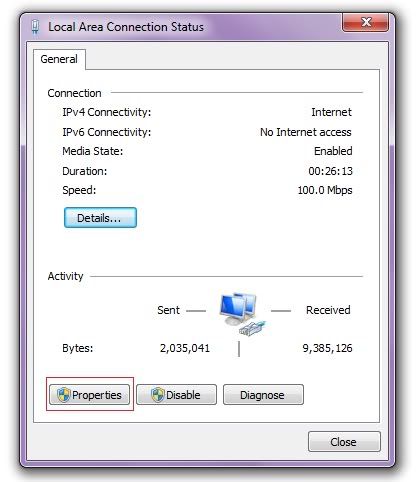
Step 4: Under the Networking tab click on the Internet Protocol Version 4 (TCP/IPv4), and then click Properties
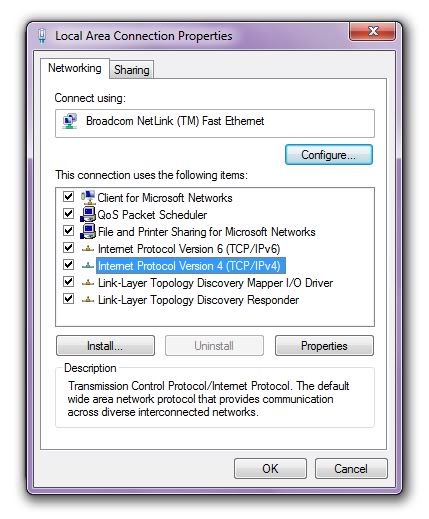
step 5 : Now under the option DNS Server address you can see your default DNS address , copy them, and then change the Preferred DNS Server and Alternate DNS server address and Replace those addresses with the IP addresses of the Google DNS servers: 8.8.8.8 and 8.8.4.4.
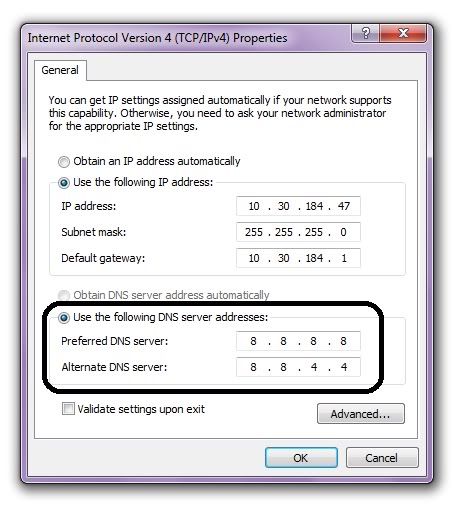
Step 6 : Now Restart the Local Area Connection and Internet Connection.
How to Test Google DNS Servers
Open your command prompt and clear your DNS cache using the command ipconfig /flushdns. Then do a nslookup for any web address and you should see 1e100.net with 8.8.8.8 as the IP address for the DNS resolver.

Open your command prompt and clear your DNS cache using the command ipconfig /flushdns. Then do a nslookup for any web address and you should see 1e100.net with 8.8.8.8 as the IP address for the DNS resolver.
